|
Allocating a staff member to a job |
  
|
|
Allocating a staff member to a job |
|

1. Click "Job Maint" icon on top menu bar, "Job Maintenance" window should appear
2. Input "Company" (venue name) located top left area of the window
3. Select date range where the job is located by using the drop down calendar
4. Click "Find", a list of jobs fitting this description should appear in the bottom section of the window
5. Right click the job you require, a selection of options should appear
6. Select "Roster by Job", the job should appear
OR
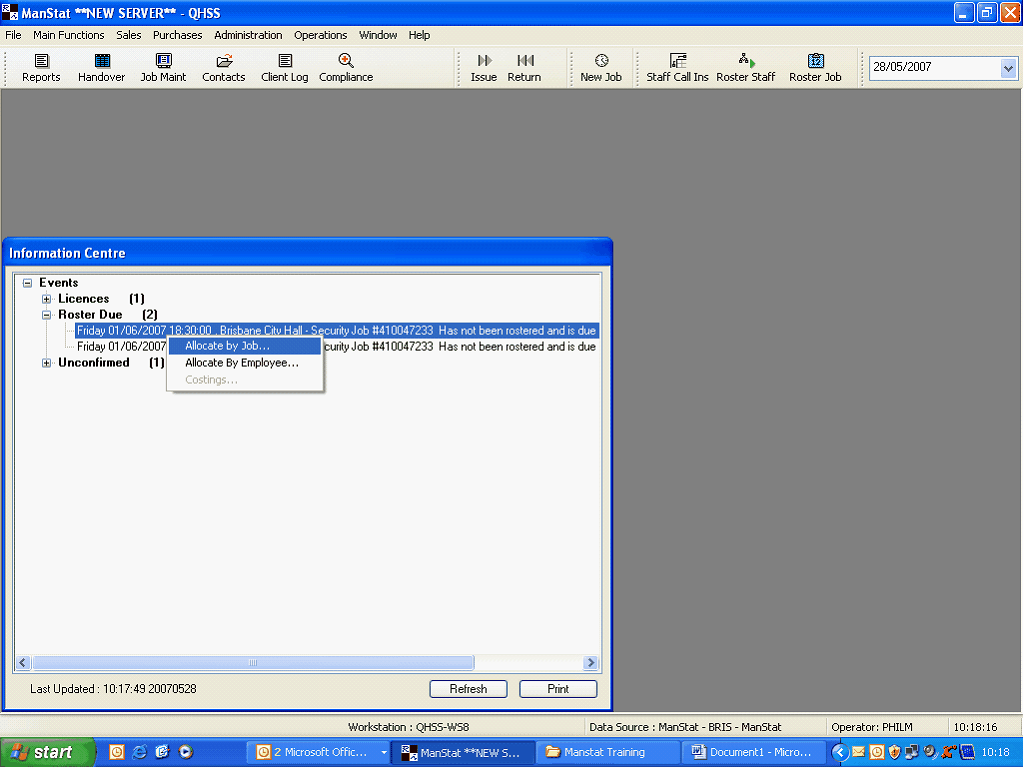
1. Select job from Information Centre
2. Right click Job required, two options should appear
3. Click "Allocate by job", allocate work by job should appear, see below
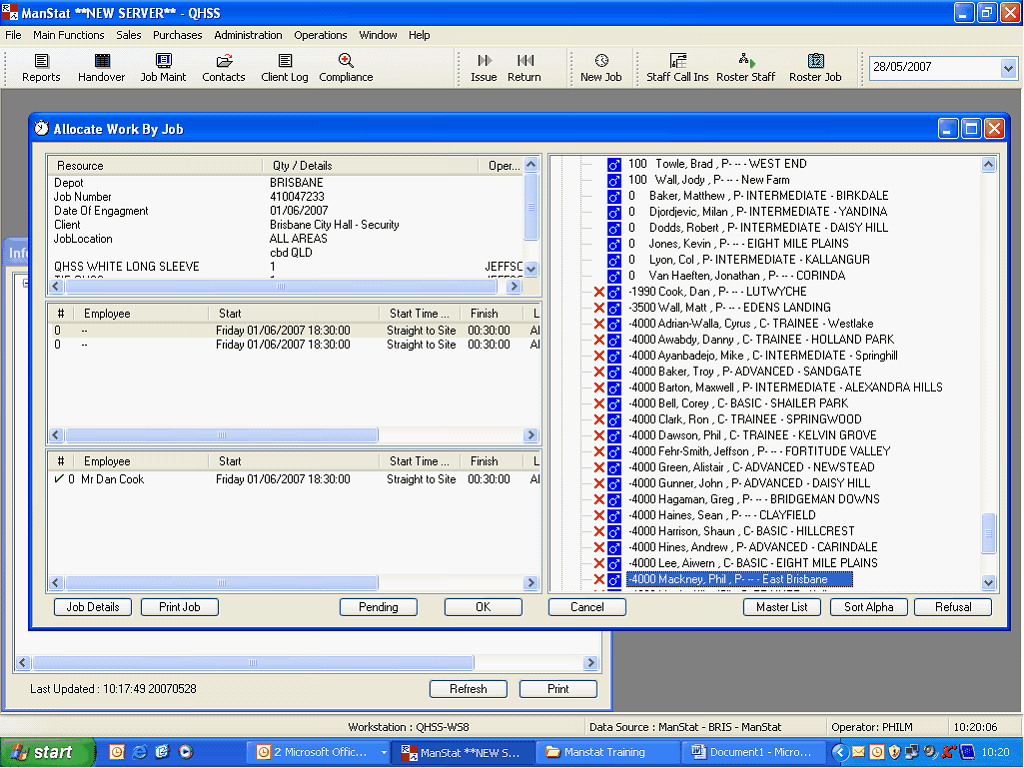
1. Select time you wish to allocate a staff member to, these times can be found in the middle section of the window
2. Select Employee by clicking once over the employees name
3. Double click Employee, the employees name should appear in next to the time in the bottom section of the window
4. Continue to do this until you have filled all of the desired shifts
a. Any staff member with a red X beside their name may not be able to be rostered to the shift for a number of reasons, you can check this by right clicking over the employees name as shown below
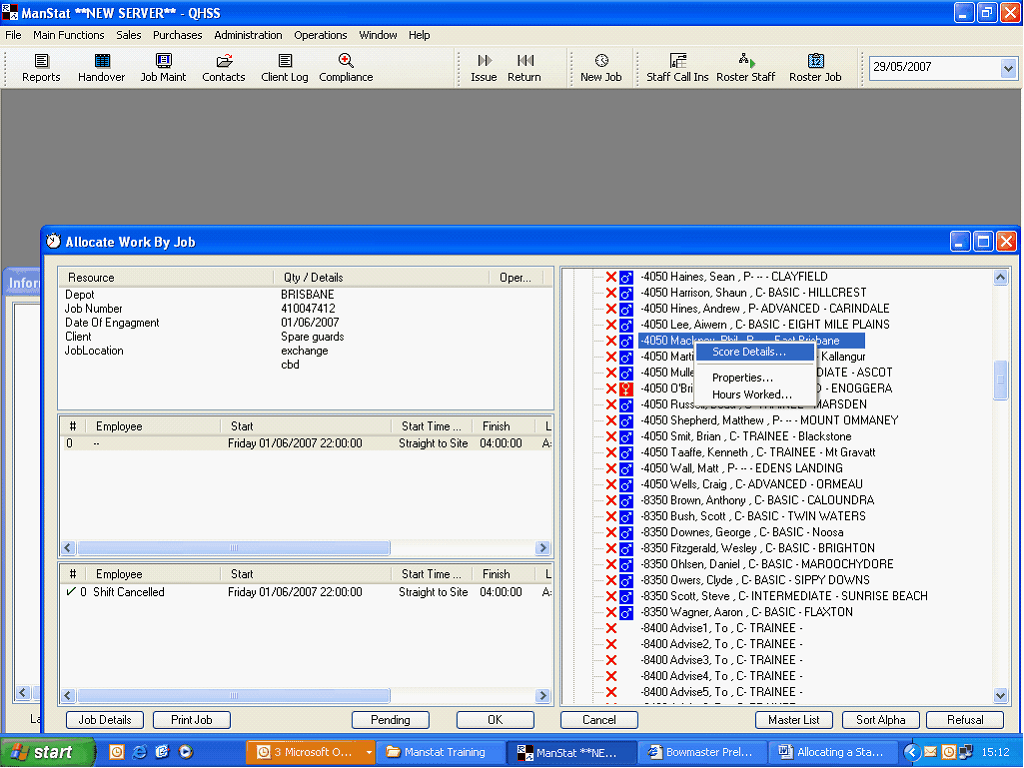
5. Three options appear,
a. you can select "Properties" and the "Change Contact" window will appear
b. "Hours worked" will show a breakdown of the total hours that en employee has worked that roster period
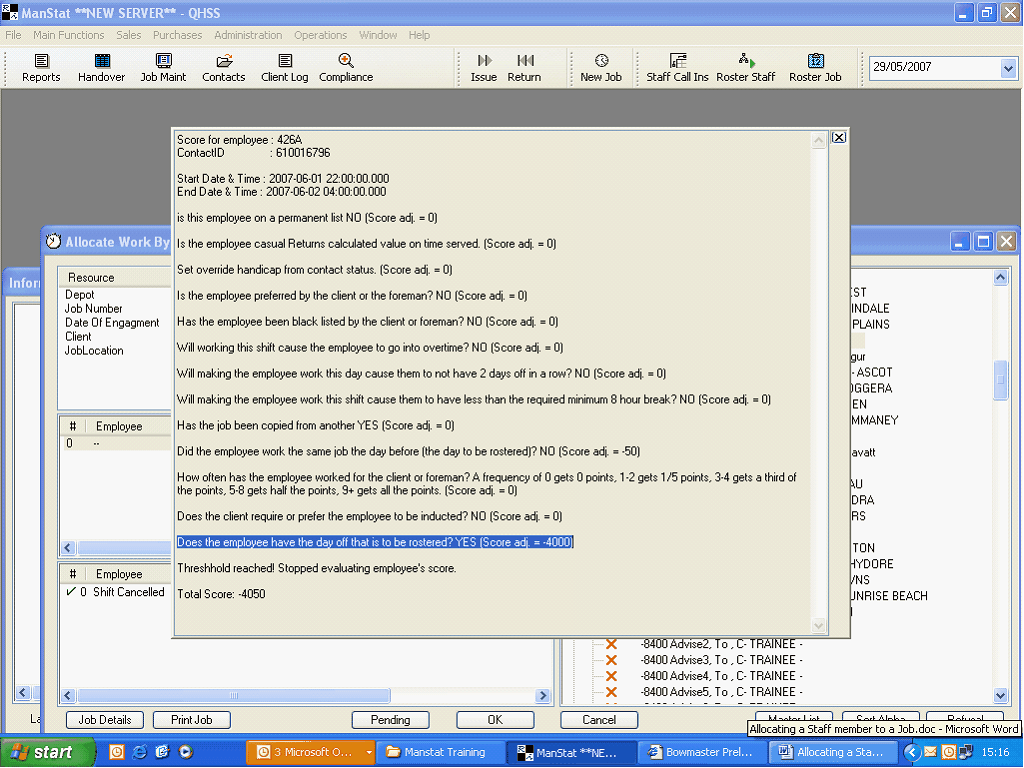
c. "Score Details" will show where the employee has gained or lost score points see below
6. Once you have completed the required task
7. Click the "Pending" button when complete, you will return to the information centre main page