|
Adding a New Employee |
  
|
|
Adding a New Employee |
|
1. Go to Main Functions on the top bar and click on Contact Maintenance.![]()
2. Select Add at the bottom of the Contact Maintenance window, the Add Contact window will appear as below. The Record Format will default to Client Contact.
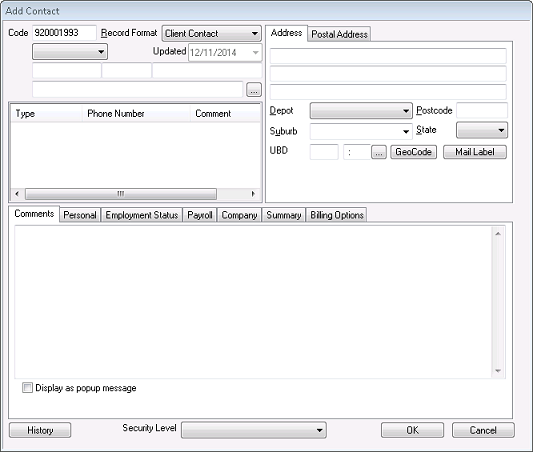
3. Select Employee from the Record Format field.
4. Select title.
5. Enter their name. Hover over empty fields to find out where to enter information.
6. Click on the Lookup button ![]() to allocate which parent company the employee belongs to.
to allocate which parent company the employee belongs to.
7. Contact Find window should appear as shown below.
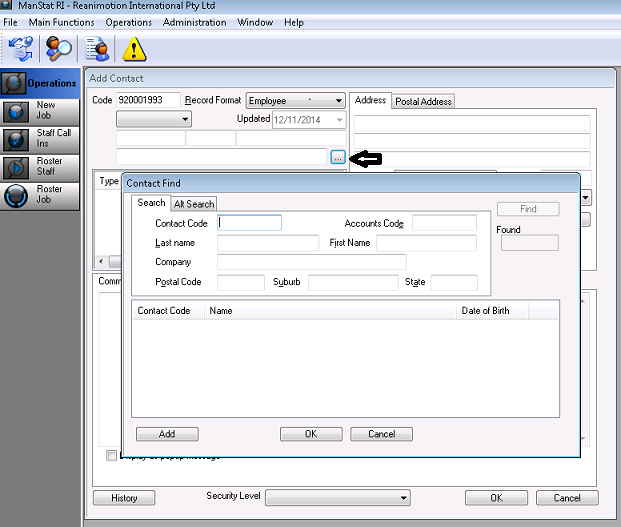
8. Go to Alt Search and from the drop down arrow for Contact Type, select System Account
9. Click Find
10. Double click on your company. The employee is now linked to the company
11. Enter their address in the Address tab.
12. Select Depot from the drop down box located just below the address section.
13. Enter Suburb, State and postcode located in the same area.
14. Right click over phone number.
15. Select Add Phone Number.
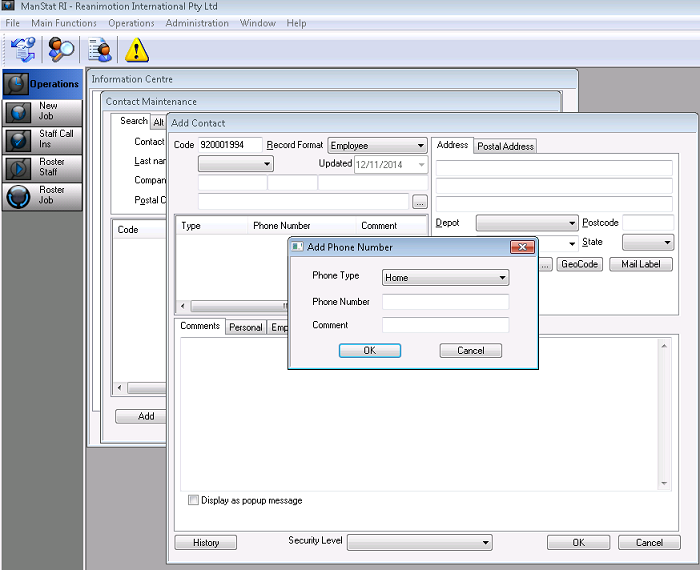
16. Enter phone type.
17. Enter phone number ensuring that the area code is also entered with no spaces or brackets.
18. Enter Comment. When inputting the next of kin phone number ensure that the name of the next of kin is placed in this section.
19. Click OK.
20. Repeat until all contact numbers and emails are entered.
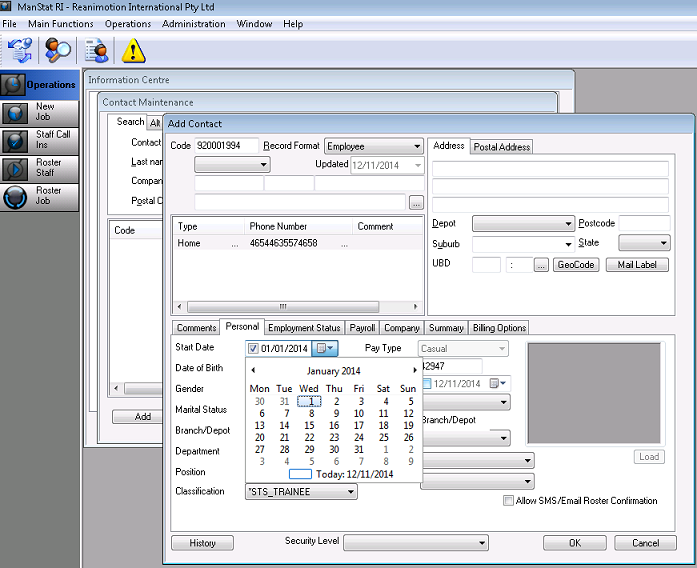
21. Select Personal Tab.
22. Select the Start Date.
23. Select Date of Birth.
24. Select Gender.
25. Select Branch/Depot.
26. Select Department.
27. Select Position.
28. Select Classification
***Note: In order to be a driver you must select a “DRI” classification
29. Select Co Op Lic as Valid if the person is allowed to drive a company vehicle.
30. Click on the check box to Allow SMS/Email Roster Confirmation (if using this feature).
35. Click OK.
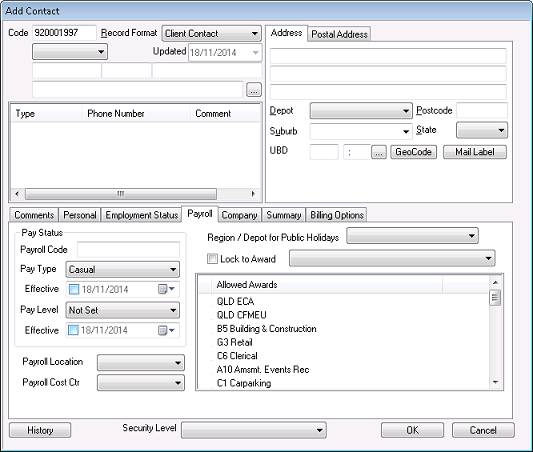
31. Click on the Payroll tab.
32. Copy the employee accounts code into the Payroll Code section of the Payroll tab
***Note: This code needs to be the same as the code in accounting system for this employee for the payroll to be correct
33. Input the Pay Type i.e. Casual/Fulltime/Part-time
DO NOT TICK THE EFFECTIVE DATE unless you are aware of the exact date they need to be paid from. The effective date automatically switches between PPT and Casual if set and will have a detrimental effect on payroll generation if activated on engagement of the employee.
34. Enter the Pay Level i.e. Level 1 is generally selected for new employees as shown above
DO NOT TICK THE EFFECTIVE DATE – This refers to when an employee’s levels change not when they start working.
35. A box will appear asking if you wish to save this contact, click yes.
36. Search in Contact Maintenance and check to see if employee was entered correctly.
Once a new employee has been added, upon leaving and re entering the employee record, new tabs will appear such as Licences, Skills/ Inductions, etc
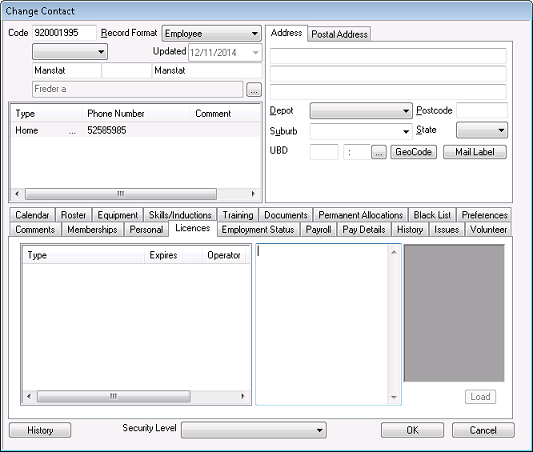
37. To add a License, select Licenses on tab menu bar.
38. Right click in Type
39. Select Add License.
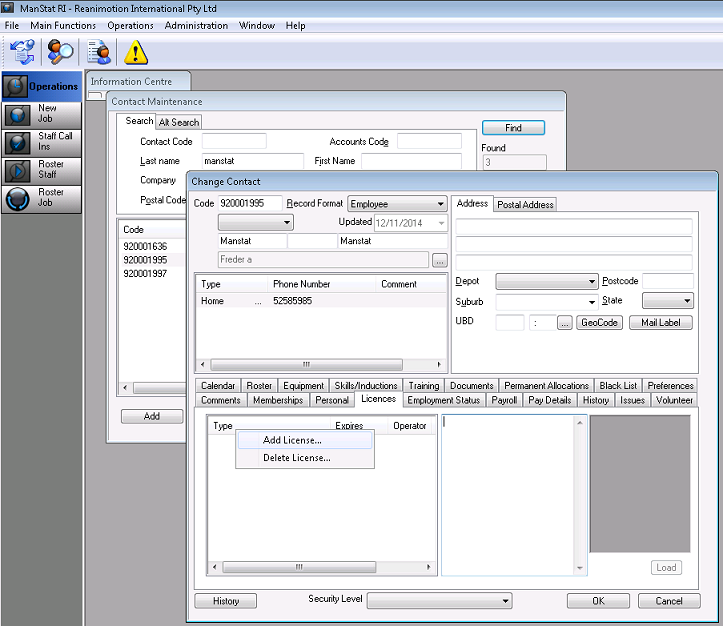
40. Select Type of license.
41. Enter the expiry date from calendar.
42. Enter notes (This should include license number and any conditions on number).
43. Click OK in the window.
44. Repeat until all licenses and certificates are entered.
45. Click OK