|
Contact Import |
  
|
|
Contact Import |
|
Often a list of new contacts and their details maybe supplied to you by another organisation. If this information is in the form of a DBF file, ManStat allows you to electronically import these new records quickly and easily by using the Import Contacts function. To access this function, simply select Import Contacts from the Production menu located at the top of the ManStat screen. This will reveal the Import Contacts screen.

At the top of the Import Contacts screen is the Source File field, and the associated Open button. Click on this button to reveal a search screen that operates similar to Windows Explorer. Use this screen to locate the file to be imported. Please note that ManStat will only allow you to import DBF files.
Once you have located the correct file, simply click on the Open button located at the bottom right of this search screen. ManStat will then display the name and file path for this DBF file in the Source File field.
The Import Contacts screen has three list view fields that you can move between by clicking on the ManStat Fields, Source Fields and Preview buttons, which are located directly below the Source File field. Click on the ManStat Fields check box, and all the ManStat data fields will be displayed in the first column of the list view field.
The DBF file being imported will also contain various data fields, however the name of the data fields may be different. For example, a contact's last name will be recorded in a field called "LastName" by ManStat, however the DBF file may record the contact's last name in a field called "Surname". ManStat allows you to match the fields manually so that no errors are made in the transference of data from the DBF file to the ManStat contact records.
To match the data fields, simply double click in the Source Column cell that is next to the ManStat data field to be matched. This will reveal a drop down list, which contains the names of all the data fields of the file being imported. Simply scroll down this list and select the field that best matches the ManStat data field.
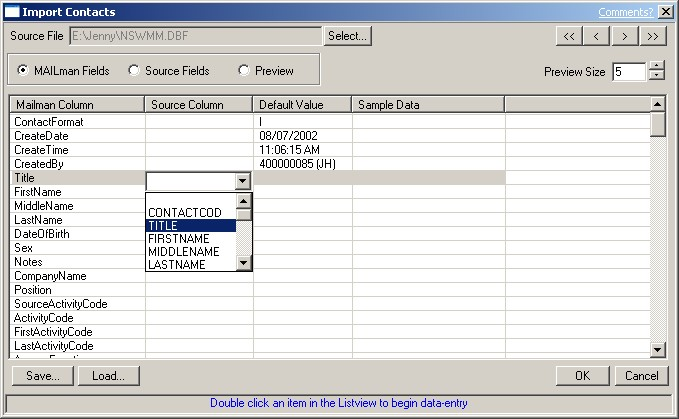
Continue this process until all the desired fields have been matched. ManStat will display the information on the file being imported that is included in each matched field in the Sample Data column. This will allow you to check that you are matching the data fields of the file being imported to the correct ManStat data fields.
To scroll through the data that is contained on the file being imported, use the << , < , > and >> buttons that are located at the top right of the Import Contacts screen. The left button will display the first record that is contained on the file being imported, and the right button will display the last record. The two middle buttons will scroll through the records one at a time. In this way, ManStat allows you to look at more than one record to ensure that the data fields are being correctly matched.
ManStat also allows you to manually enter information to all the records being imported. For example, you may want to enter "This contact was referred by….." in the Notes field of all the contacts being imported. To manually enter the same information to all the records being imported, simply double click on the cell in the Default Value column that is next to the ManStat field that you want to contain the information. Simply enter the information in the field that is revealed.
It may be easier for you to match these fields the other way around. That is, to match up the ManStat data fields to the data fields of the file being imported. To do this, simply click on the Source Fields button located above the list view field. ManStat will now display the data fields of the file being imported in the first column of the list view field.
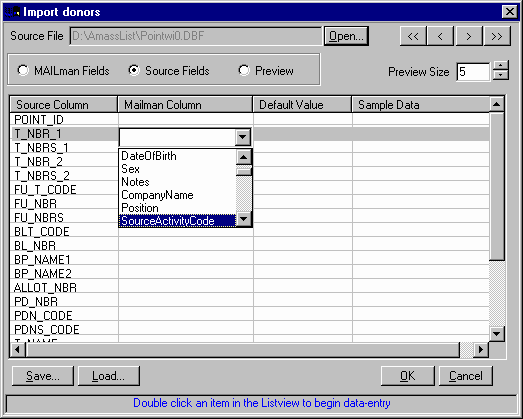
To match the ManStat data fields, simply double click in the ManStat Column cell that is next to the file data field to be matched. The drop down list revealed will contain the names of all the ManStat data fields. Simply scroll down this list and select the field that best matches the file data field.
ManStat also allows you to preview the information that is contained in the file being imported. To preview these records, simply select the Preview button located above the list view screen. ManStat will display all the data fields of the file being imported as columns in the list view field, and each record will be displayed as a line item.
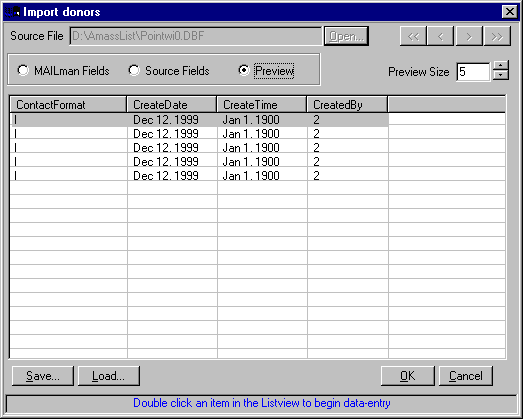
By using the Preview Size spin box located to the right of the Preview button, you can modify the number of records being displayed. ManStat allows the number displayed to be limited, as often files being imported are very large.
ManStat allows you to store the settings that you have established, in case you will need to import a similar file at a later stage that contains the same data fields. To record these settings, simply click on the Save button located at the bottom left of the Import Contacts screen once you have established all the desired fields. This will reveal the Save Import Session screen.
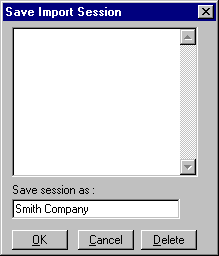
At the top of the Save Import Session screen, all previously recorded data field matches will be displayed. To save the current settings, simply enter a short description in the Save Session As field and then click on the OK button. The field settings you have established will then be saved under the short description you have provided for you to access next time you need to import a file that contains the same data fields.
If you wish to replace settings that have been previously saved with the current settings simply click on the relevant description that is displayed at the top of the Save Import Session screen, and then click on the OK button.
ManStat also allows you to delete previously saved settings from this screen. To delete previous settings simply click on the relevant description that is displayed at the top of the screen, and then click on the Delete button located at the bottom right of the Save Import Session screen.
When you wish to import a file that has the same data fields in the future, simply click on the Load button located at the bottom of the Import Contacts field. This will reveal the Load Session screen.
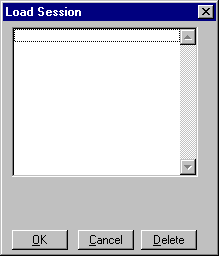
The descriptions for all previously saved import settings will be displayed at the top of the Load Session screen. Simply select the settings that you wish to repeat, and then click on the OK button located at the bottom left of this screen. ManStat will then return you to the Import Contacts screen, and the data fields of the file being imported will be matched to the ManStat data fields.
To delete previous settings simply click on the relevant description that is displayed at the top of the screen, and then click on the Delete button located at the bottom right of the Load Session screen.
When you are importing contacts, ManStat will display a short message at the very bottom of the Import Contacts screen. This message is a quick reference guide on what your next step will be to successfully import contacts.
Once all the required data fields have been matched, simply click on the OK button located at the bottom right of the Import Contacts screen. ManStat will then begin importing the records contained on the file to the ManStat contact records. If you do not wish to continue with the import once you have matched all the relevant fields, simply click on the Cancel button located at the bottom of the Import Contacts screen. To access the records that have been imported, simply select Contact Maintenance from the Main Functions menu located at the top of the ManStat screen. This will reveal the Contact Maintenance screen, which can be used to display the full records of a particular contact. For more information on how to use this function, please refer to the Help chapter entitled "Contact Maintenance".