Adding a New Material
| 1. | Go to File – System Setup – Lookup Table Maintenance. |
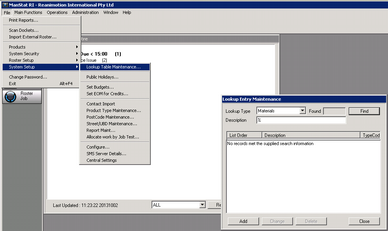
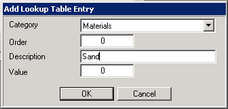
| 3. | Enter the name of the new material in the Description field. |
| 5. | Go to File – Products – Product Maintenance. |
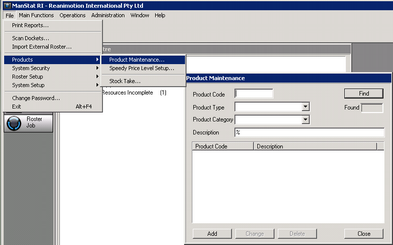
| 7. | Make sure the Product Type is Billable Equipment. |
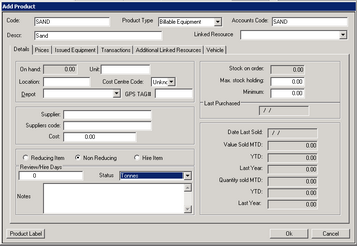
| 8. | Add a product Code, an Accounts Code and enter in the Description. |
| 9. | In the Details tab, select the required Status of this material e.g. if the new material is Sand, the Status could be Tonnes. |
| 10. | Go to the Additional Linked Resources tab and double click on the new material added in the previous step so that a green tick appears next to it. |

The new material is now linked and can be viewed under the Materials tab in New Job.
| 12. | Go to required client in Contact Maintenance. |
| 13. | Select the Discounts tab. |
| 14. | Deselect all the ‘Categories’ not required for material purchase by double clicking on each one until a red cross appears next to them. |
| 15. | Leave the Category needed for this clients material purchase e.g. if this client purchases tonnes of sand, do not double click on Tonnes. |

Whenever this client purchases sand, they will be billed in tonnes.
| 16. | To add or change a status, go to File – System Setup – Lookup Table Maintenance |
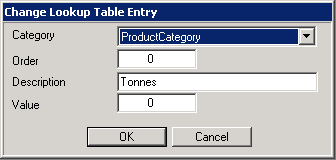
| 17. | Select Product Category and press Find. The current categories will appear. |
| 18. | Select the category that needs amending or press Add to add a new category. |